Showing posts with label FLOURISHES. Show all posts

Monday, October 27, 2008

It's just some Walmart paper too...


I am so spoiled my Dear Sweet Neighbor and I were looking at some of her creations last night she knows I want the new stampin up scallop punch so she had made some squares with it and shared a few with me...


Flourishes stamps
scallop square from neighbor ( stamping up scallop punch)
Walmart background paper
stampin up button and clip from (gale),ribbon brown and pink
dew drops,watercolored pencils, basic black ink,white gel pen...

Have a Happy Monday Everyone...


Monday, October 20, 2008

MAY YOUR BLUES FLY AWAY...

Here is one I will be sending to a friend who says she has the blues (May your blues fly away) ... She is sad because she can not be with her Granddaughter on her birthday... On to the details: I used some stamping up paper that I have been saving, along with a new flower from flourishes stamps. I used twinkling H2O to paint flower and then I highlighted with my white gel pen. The bird and the little white flowers are from out local dollar store...

Tuesday, October 14, 2008

POPPIES


I had to make another card tonight so I could enter another challenge on scs flourishes forum... I have ordered more sets from flourishes as of now I have only three, so needless to say it's hard to enter with using the same stamps over and over...

I stamped the poppies in brown marvy ink then I colored with water color pencils. I then used three colors of marvy ink that I thought would complement The color of the poppies, used a brush to apply ink. Then I went over the poppies with a white gel pen, added some layers of different color paper and a black ribbon... Well I just love poppies and most people can grow them here in Texas but I can't...clueless as to why!

Thank you all so much for sharing in my new creation, your visits to my blog overwhelms me each and everyday and for this I thank you with my whole heart!!!

Im a Featured Stamper

Hello everyone...Im a Flourishes Featured Stamper and my card was selected along with a few others to be posted on flourishes news letter blog "its the wild card challenge"... here is the address if you want to take a peek: http://www.flourishesnewsletter.blogspot.com/
Because my card was picked I will get entered into a monthly drawing to win a free stamp set...

Saturday, October 11, 2008

Its Another Christmas Tree...


Ok so this picture and card did not work together this afternoon, As I was getting everything ready to take the picture, setting camera,lights ect... my black background paper kept falling over the card. Each time I though I had it fixed oops there it did it again falling slipping... After many tries atlas I got the paper to stay and took the picture ,then I ran down stairs to the computer to download. Now as I was spending so much time with the background paper I forgot to remember that my beads had not dried all the way on the card... so slip slip they went down the tree to settle in a place that was not of my choosing!!!

Friday, October 10, 2008

Made for Chat Challenge


Here are two cards for the Chat challenge at scs... We can only use flourishes stamps along with only colors of red white and Black. Although I'm not very happy with the picture of the tree because all the stars did not seem to show up, but life goes on! The tree is from flourishes that I stamped in black then added a red trunk that I layered on nesties. I put plastic clear star beads along with some small red dot ones on the Christmas tree just with glue but it still needed more. More seems to be what I like. I then added spots to the nesties with a black and white gel pen. I used stamping up punches and the middle was stamped out with a corner punch, that I took the corner off . Then all was layered and more dots were added then placed on right top of card with a glue dot, then two colors of ribbon to the bottom.
Second card: more red white and black stamped image with Stampin up real red ink added birds then all was clear embossed then it was once again layered on some nesties... all back ground paper is layers of black and white, top layer added red and white ribbon (two sided ribbon) then added image on nesties with glue. still needed more...me and that more word... Added red and white dotted brads and then words framed out with layered paper that says come fly with me... But Even though I do not like to fly I like my feet planted on the ground most of the time the saying with this stamp set is really perfect I think!!!

Wednesday, October 8, 2008

Red White Black Challenge...


This is for a new challenge at scs, we were to use red white and black! So on to the details: I embossed the the tree in red no special embossing powder just a red I picked up at the local craft store and then I layered in some black and red paper for trim. I then inked small tree in black added some liquid applique to make the tree look like it had been kissed by the first snow.Added a little black for border and red brads and layered ribbon under image that I set using pop dots. Added circles of all three colors on top right of card, middle circle used a punch for image then I added some dots...Ouch I just saw that my ribbon slid down on this picture, oops better pay more attention next time!!!

Monday, October 6, 2008

Thinking of the Beach...


My husband has been away in Charleston S.C although he arrives home today he has been telling me lots about his trips to the beach, surfing,sailing,etc... All I can say is I want to walk on the beach but life does not afford me a adventure at this time... So I took one in my craft room today... The tags were pre-made that I found at our local 99 cent store, I inked the beer mugs brushed on a little extra beer color then added some liquid applique to the top, and put on tag using pop dots. I layered some papers stamped on cheers then added some dew drops. I used vellum and ribbon and added another of the pre-made pieces that also came in set then added to bottom... Makes me think all about the good time my husband has been having and at-last he can have the household trash duty again!!!

FOREST OF TREES...


I am having so much fun playing with this new stamp set from flourishes called "Forest of Trees"... I layered a mix of different papers for the back ground. Then I stamped tree image in brown marvy ink and brushed three colors of ink over stamped image... Then I added chipboard with the three images also from this same set, I'm very happy how this card came out, what do you think about this new set?

Sunday, October 5, 2008

Old World Lilic...


I really wanted my lilac's to look kind of distorted, somewhat old world looking... I stamped them twice with two colors of marvy ink (dark blue & purple) then added some extra dots in the middle with two colored gel pens white and dark purple. Then I brushed over the image with a burnt orange to give it the old look. I layered behind image black paper then a white paper that I inked in dark blue. Added some dew drops and some ribbon and chipboard put on two pop dots with the word lilic stamped in dark blue, oops almost forgot about adding my little bug...

Tuesday, September 30, 2008

masculine card

I was looking at my new technique junkie newsletter and found this really cool technique called: snakeskin... When I saw this I thought of my shirt and beer mug from flourishes. I used glossy card-stock and sponged three different colors of ink, lightest to darkest, ink that look like a skin. Then when ink is wet I coated in clear embossing powder. Before I was to heat I made horizontal lines then vertical lines with my bone folder then I heated ... wow does my shirt look like a snakeskin?

SCS Challenge...


I entered a scs challenge today, it was to use flourishes stamps and a animal... This was the first time this set was inked so at first I was kind of having alittle trouble trying to decide what I would do with it but that only lasted for seconds ,then it came together very fast once I had a picture in my head. This is one of only 5 sets I have from flourishes but lucky me it had birds so I could enter the challenge... I stamped the back ground stamp with marvy in then I added some dots to the flower with a glitter gel pen, and colored the leafs with watercolor marker, added a black border. placed all on a purple pattern paper that I added three sticky back pearls to corner. Then I used some chipboard at bottom and a scollop that I placed bird on. I made my bird look kind of rugged looking and used 2 pop dots to make him really stand up...

The tree...


Wow I just love my new sets from flourishes and this set is called : Forest of trees... I used some marvy ink in three shades total for the back ground behind the tree. Then the tree still needed some color so I brushed on some light green shades on top of tree image. A nestie is used for layers that I colored dark brown and added some white dots and then added some twine for a natural element. I used the leafs from the set to make a side border...It's hard for me to think about fall because by flowers are still blooming outside and keeping me busy watering still. Soon here in Texas it will be time to rake leafs before I know it!!!

Monday, September 29, 2008

Pretty lace...


Morning all... Had to take a break from making Christmas Cards this morning and because watering my garden is my next stop I Made another flower card...
Details: I used a corner punch which I took off the casing and made a lace like paper to string my pearls. I then added different layers of paper, background paper being another paper I made using simple green. I cut out my lilac flower and water colored with water color crayons and a blender pen. I used nesties under word which I also colored with my blender pen and added some white gel pen dots...

Wednesday, September 24, 2008


I have been playing around with my new sets from flourishes, and this came out cute, I just wish more of the details on the poppy and the words showed up better in the picture, because holding the card the flower is really pretty with all it's layers and the color is just stunning...well I think it is! This I am going to be mail to a friend. This friend and I found each-other again after more then 30 years, she lives in Germany so this card must travel a long way...
On to the details: I colored the flower and the leafs with water color markers then I cut everything out, making a extra top for the flower cutting out of middle on this extra top. I wanted this flower to really look dimensional, I colored with three colors and added white gel pen to the vines of the flower. I embossed flower top and leaves. stamped saying on round chipboard with black ink then put some ribbon behind. I stamped word poppy with chocolate chip ink and added some gel pen dots, background is made with marvy ink and simply green...

Thanks for looking and have a great day!

Tuesday, September 23, 2008

Alzheimer's


This card was made for Cammie's Challenge... Cammie started this to Honer Her GrandMother who suffered with Alzheimer;s for many years. Whimsical Autumn illustrated by Cammie was released by Gina K designs. Cammie is donating all fo her proceeds to the Pennsylvania Chapter of Alzheimers Association, in hornor of her GrandMother....

Please go and read about this challenge here: http://myblogbycammie.blogspot.com/2008/09/gkd-whimsical-autumn-preview.html

There ar lots of companies who donated , Flourishes, Starving Artists, My Favorite things, along with lots people who donated like: Denise Marzee and Kittie Caracciolo just to name a few. The blog candy is worth an amount of about 1000 dollar's of some really great stuff and I mean great! Please go and check it out for yourself it's for a great cause....

I am going to sent this card to my Mother who is a wonderful care giver of my Father...

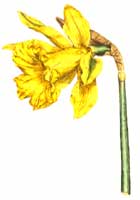
This was made with my new stamp set from Flourishes. I made the background paper with marvy ink (three colors) and simple green. Then I used embossing power to coat and glued with a black border,Then I added my flower which I made extra leafs so they would pop a bit and some white spots to the flowers with a white gel pen, that was also embossed with clear. Then the tag has three layers which I colored with water color markers, added word and some dots, then you guessed it embossed, i love the look of embossing. some pretty ribbon was added purple and pink. Thanks for looking and I hope you play along too...